HomeKatyRecipe CollectionHome

Pages

Monday, February 28, 2011

King’s Cake


I love King's Cake, the bright colors, the gooey goodness inside and of course the plastic baby. So I set out to make one yesterday and realized why most people buy them instead of making them. They take FOUR hours. You can't get around that, and all the reviews of it said one way to make it easier was to make it in a bread maker; however, I do not have neither the money to buy a bread maker nor the space to put one. I was stuck making it by hand for four hours and once I halfway done, I realized the recipe was for making double. So luckily, my gracious boyfriend was nice enough to take one off my hands. The recipe is very delicious and I highly recommend it, if you have four hours to spare and the patience to knead dough for 10 minutes. Also I made a few changes to the original recipe, I halved it, so you only have to make one cake and I doubled the filling, since mine didn't seem to have enough plus I added some lemon juice to the icing as it was too sweet even for my large sweet tooth.
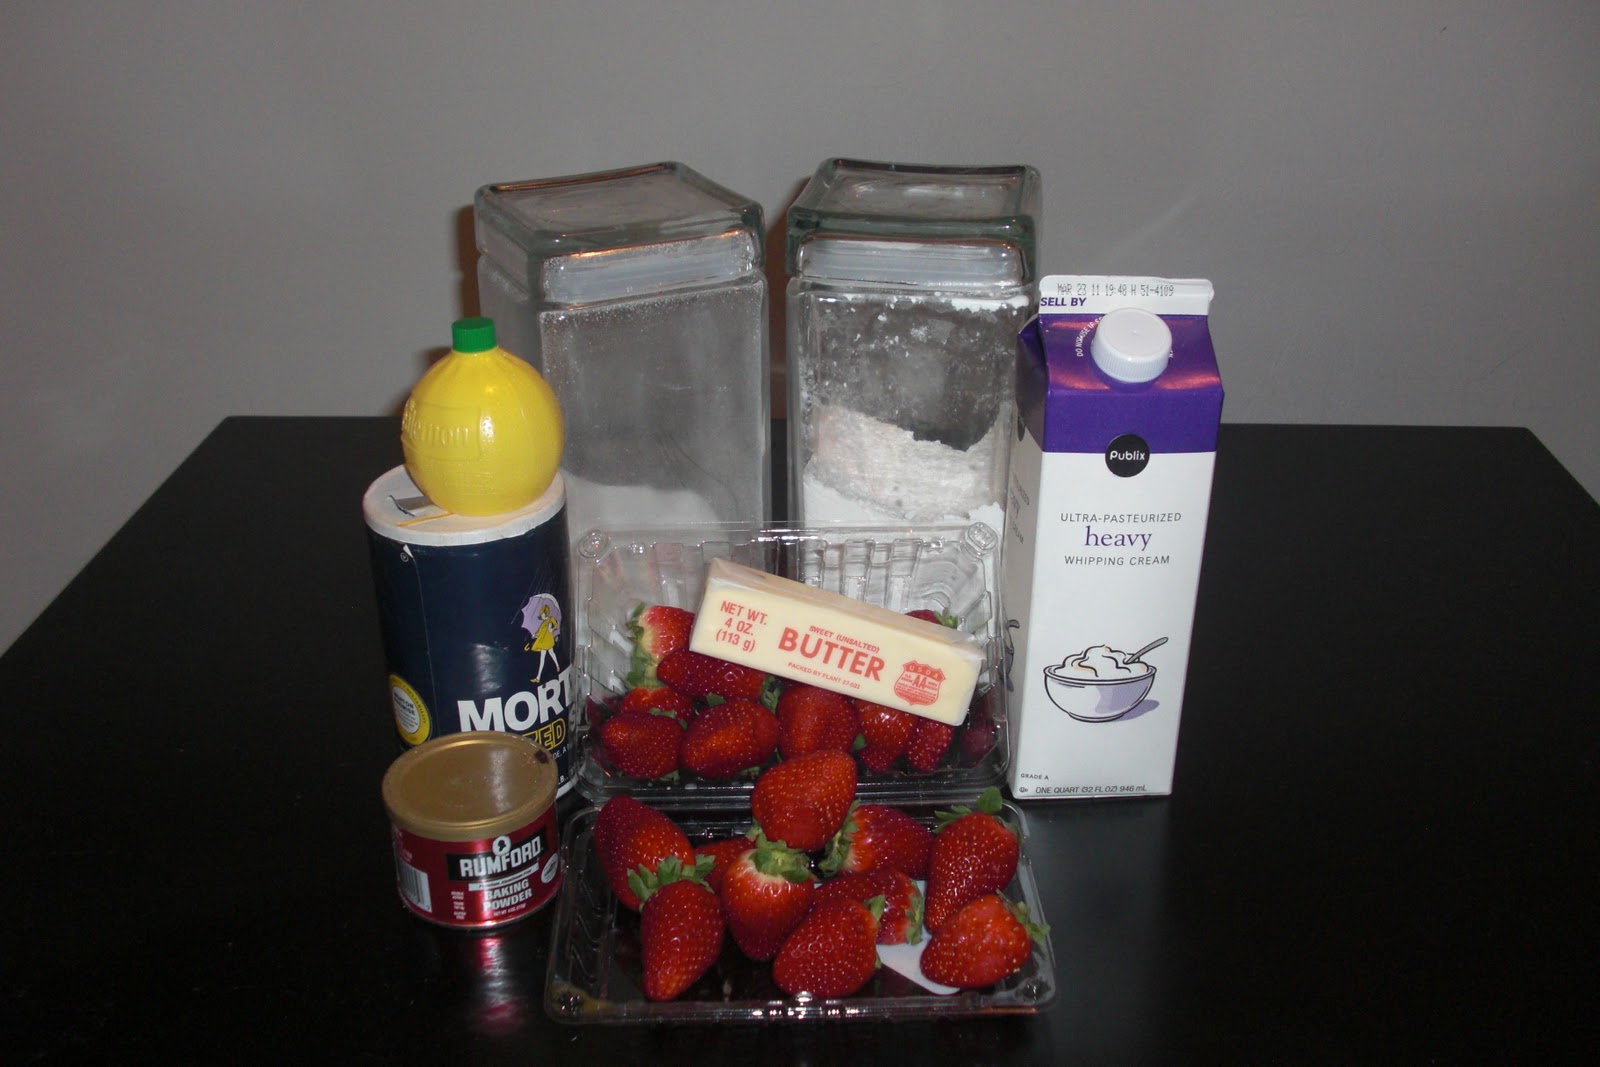
  • PASTRY:
  • 1/2 cup milk
  • 1/8 cup butter
  • 1 (.25 ounce) packages active dry yeast
  • 1/3 cup warm water (110 degrees F/45 degrees C)
  • 1/4 cup white sugar
  • 1 eggs
  • 3/4 teaspoons salt
  • 1/4 teaspoon freshly grated nutmeg
  • 2 3/4 cups all-purpose flour

  • FILLING:
  • 1 cup packed brown sugar
  • 1 tablespoon ground cinnamon
  • 2/3 cup chopped pecans
  • 1/2 cup all-purpose flour
  • 1/2 cup raisins
  • 1/2 cup melted butter

  • FROSTING:
  • 1 cup confectioners' sugar
  • 2 tablespoons water
  • 1 teaspoon lemon juice

Directions *I added notes between the *s in the directions*

  1. Scald milk, remove from heat and stir in 1/8 cup of butter.*To scald mean to basically burn, you want it to 185 degrees F or basically until it starts to boil* Allow mixture to cool to room temperature. In a large bowl, dissolve yeast in the warm water with ½ tablespoon of the white sugar. Let stand until creamy, about 10 minutes. *It will pouf up and bubble*
  2. When yeast mixture is bubbling, add the cooled milk mixture. Whisk in the eggs. Stir in the remaining white sugar, salt and nutmeg. Beat the flour into the milk/egg mixture 1 cup at a time. * This will get very hard to mix, you will hurt your arm and you may break a whisk* When the dough has pulled together, turn it out onto a lightly floured surface and knead until smooth and elastic, about 8 to 10 minutes. *This is a bitch, no getting around it*
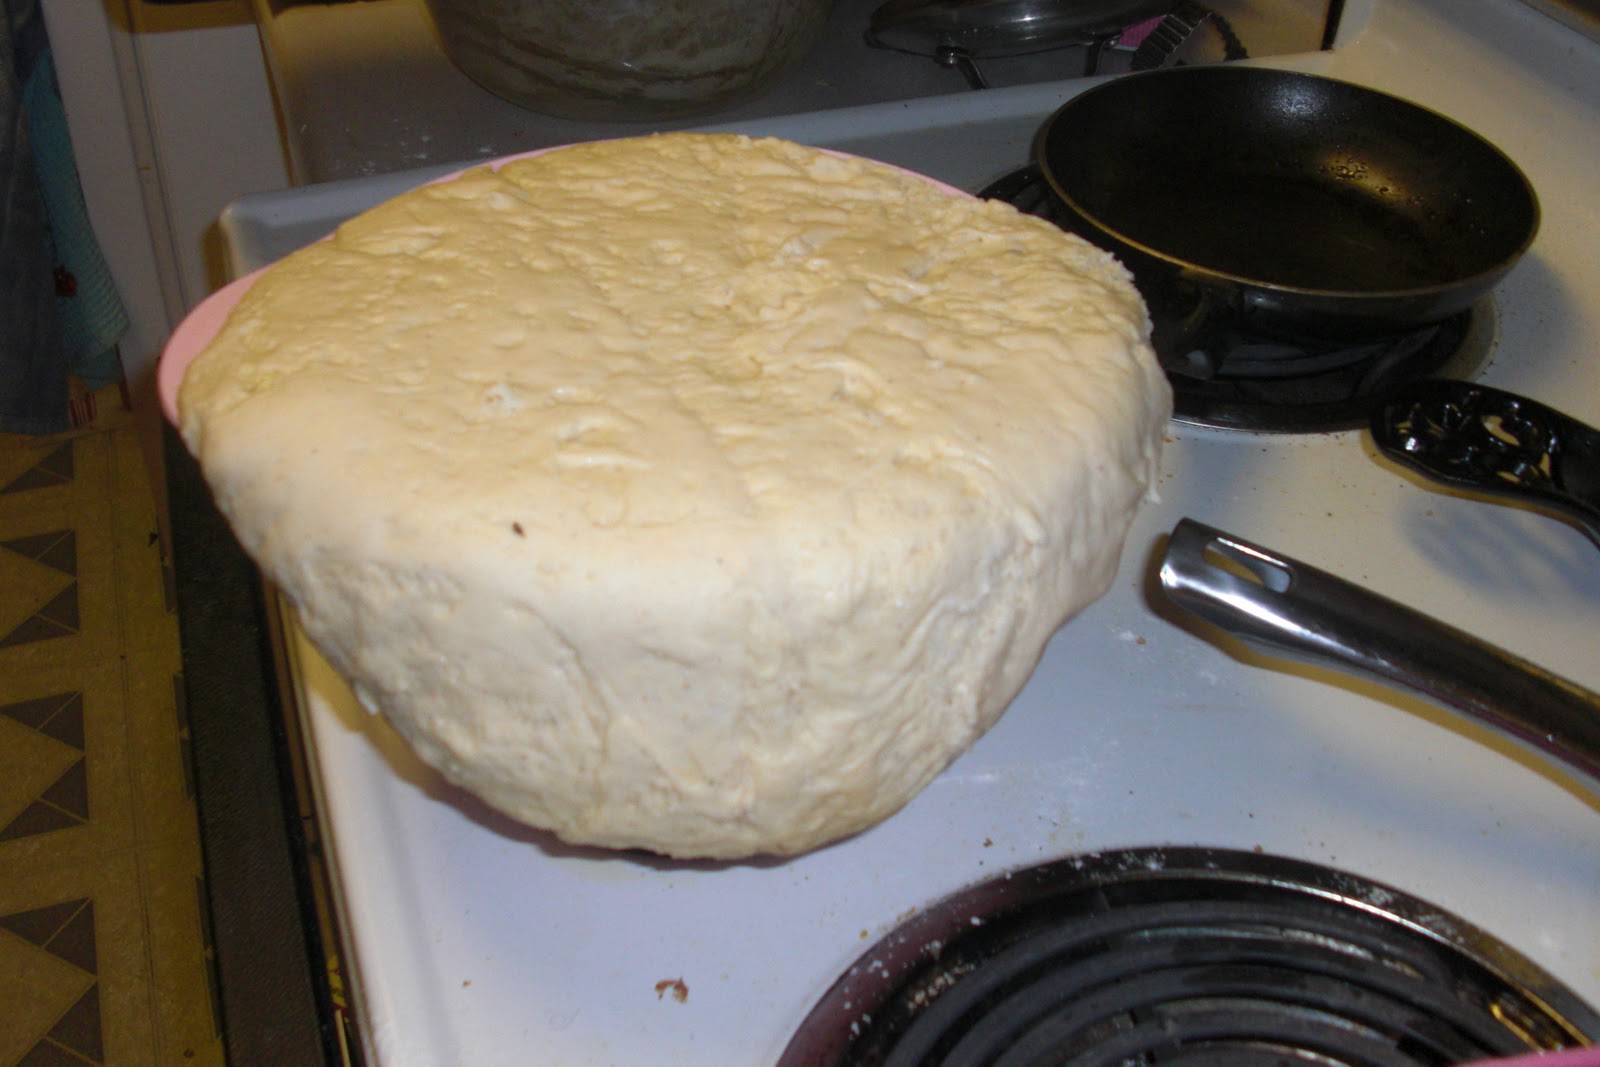
  3. Lightly oil a large bowl, place the dough in the bowl and turn to coat with oil. Cover with a damp cloth or plastic wrap and let rise in a warm place until doubled in volume, about 2 hours. *Yes, really, it will double in size*
  4. When risen, punch down *This is fun* 
  5.  
    1. Preheat oven to 375 degrees F (190 degrees C). Grease a cookie sheets or line with parchment paper.
    2. To Make Filling: Combine the brown sugar, ground cinnamon, chopped pecans, 1/2 cup flour and 1/2 cup raisins. Pour 1/2 cup melted butter over the cinnamon mixture and mix until crumbly.
    3. Roll dough out into large rectangles (approximately 10x16 inches or so). Sprinkle the filling evenly over the dough and roll up each tightly like a jelly roll, beginning at the wide side. Bring the ends of each roll together to form oval shaped rings. Place the ring on a prepared cookie sheet. With scissors make cuts 1/3 of the way through the rings at 1 inch intervals. Let rise in a warm spot until doubled in size, about 45 minutes. *Oh my god, it does double again!* 
    4. Bake in preheated oven for 30 minutes. *check it at 20 minutes, they tend to bake quickly, and you don't want it as brown as mine*
    5. Push the doll into the bottom of the cake. Frost while warm with the confectioners' sugar blended with 2 tablespoons of water. *AND LEMON JUICE*


    1. Notes-

      1. This takes a looonnnggg time. It is intensive, you need a large surface to knead the dough and then again to roll it out and put the filling on it.
      2. You need more flour. You have to flour everything, the rolling pin, the surfaces, and the dough. So make sure you have an extra 2 cups of flour
      3. Kneading is difficult work.
      4. It will rise to double its size, make sure your bowl can handle it. Mine couldn't.
      5. The icing may need more lemon juice/ water. And you make actually want to make a second batch to drizzle over each slice. 
      6.  
        Follow my blog with bloglovin
         

      Sunday, February 27, 2011

      Martha Stewart Sunday: Body Scrub

        
        I love a good sugar scrub, they make even the most roughest of knees feel silky smooth but I don't love is how expensive they are; my last purchase of one was over 30 dollars. So I was delighted to find that Martha had put up directions on how to make your own. They are great to use for yourself or give away as cute personalized gifts, since you can change the essential oils to match the person. Also, there are tons of variations on the mixture allowing for complete customization. I changed Martha's recipe a bit, since I love the smell of brown sugar.


      Basic Body Scrub:

      2 cups of Organic Cane Sugar, Epsom Salt and/or Brown Sugar (I used a three part equal mixture)

      1 cup oil (Use Sesame oil (Neutrogena makes a great one) and/or Olive oil)

      Essential Oils (You can find these at organic sections of groceries or in craft stores, like Michael's, where the soap making ingredients are)

      Food Coloring (if you want to dye it, but that really only works if you use only Epsom salt)


      My Pom Scrub-

      3 part equal mixture of salt and sugars

      2/3 cup sesame oil, 1/3 olive oil

      3 pipettes full of vanilla pomegranate essential oil


      Container-
      You can use canning jars, or Tupperware to plain glass jars. I used a leftover plastic container that used to hold my favorite sorbet, Talenti's Roman Raspberry. The sorbet is delicious and the plastic jar it comes in is great to re-purpose for other uses!

      Directions:

      1. Pour ingredients in container and mix! The consistency should be a bit over oily, you want the scrub to stay together in your hands, not crumble into little pieces.
      2. Decorate the container- you can print out labels or modpodge paper around the container, just make sure it is waterproof!


      Here are some other great scrub recipes:

      Coffee Scrub
      Four Great Sugar Scrub Recipes
      Traditional Sugar Scrub with Vitamin E

      And here is a link to Martha's readymade clip art template labels.
      Scrub Label 1 and Scrub Label 2


      Do you have any great homemade beauty recipes?


      Friday, February 25, 2011

      Easy Entertaining: Oscar Party


             In case you live under a rock and hadn't realized, this Sunday (2/27) is the Oscars. You know that 3 plus hour award show thing where people get these little gold statues and thank the academy and maybe their husband, if they remember. Some people look really good in long beautiful dresses; some just wear swans around their necks. Anyways, the point is, the Oscars are a great opportunity to have some friends over for a nice get together. The best part is party centers around watching the TV, so you don't even have to worry too much about keeping your friends entertained. Here are some easy tips for hosting your Oscar party this weekend:


      Party Ideas:  

      You want to make sure you have plenty of room for guests to sit and watch the show comfortably, this is not the time to abide by the "only have enough chairs for half the guests" rule. Bring in pillows and blankets to make sure everyone will be comfortable watching the TV.

      That being said, it can get a bit boring during the long show, so you could print out these bingo cards for guests to play and have these score cards so guests can bet on the winners (just make sure you have a prize!).

      Another great idea is to fill a top hat or basket with movie trivia questions to ask during commercial breaks.

      Or simply write stars names on paper and stick them to guest's foreheads (or backs) and have them play 20 questions by asking only yes and no questions to guess who they are.
       

      Décor:

      Sprinkle silver, gold or black stars everywhere! Tape them to the wall, hang them from the ceiling.

      Take movie posters and tape them to the walls (if you don't have any, a print shop should be able to print you a bunch for relatively cheap. Or just go to Wal-Mart).

      Roll out a red carpet (or a vinyl one) to welcome guests.


      Food:

      Since this show lasts so long, it's best to just have a bunch of easy things to nibble on during the 3 plus hours. So think crudités and or chocolate dipped pretzels, maybe even brie bites?

      Make popcorn and have available other movie theater snacks, like junior mints or snow caps.

      Shrimp cocktails are a great idea as well; you could simply take some glasses and make each individual guest their own.


      Drinks:

      Think sparkling wines (Champagne) or even sparkling apple cider (sometimes, I prefer it!)

      Or make drinks that have movie inspiration like a Casablanca or a godfather.

      Make Oscar punch.

      Some 2011 nominated films inspired drinks.


      Do you have any great Oscar party ideas?

      Wednesday, February 23, 2011

      Weekly Wanted Wonders


      Sadly, I have started to put away the Valentine's décor and find storage for my heart plates. Actually, that's a lie. The décor is still there, I just can't make myself put it all away, I am afraid my living room will look too bare. So until I find something new to decorate with, those silly little hearts are staying up. Maybe there are Mardi Gras decorations?

      1. Balls of light 

         
        From Do It Yourself (Better Homes and Gardens) Spring 2011
         I really like this idea for a lamp and though my tiny apartment would be overwhelmed by such a piece, I think three small ones could look cute above my breakfast nook. Perhaps this will be another weekend project for me.
      2. TV Table
        I got this table for $9.99 on the clearance aisle at bed, bath and beyond. While it may not be that pretty now with a little bit of love and a lot of modpodge, I think this could be a great extra table, I am always in need of another table by my couch.
      3. Kings Cake

        With only two weeks until Mardi Gras, I have got to make a king's cake soon! I made one last year, and though you have to wait for it to rise twice, I simply love the cake and having people over to see who gets the baby (I never do, yet I keep baking the cake every year, UGH).

      4. Finding a home for my Glitter Candles

        I finally found somewhere to put my candles and I simply love how they add a bit of sparkle to the walls. Plus the stands ensure that any errant glitter is caught.

      5. Artichokes

        As I was wondering down the grocery store yesterday, they were having a sale on artichokes. I couldn't resist buying two of them. Now I am on a great adventure to find out how to use them besides spinach and artichoke dip. Here goes nothing…


        What's inspiring you this week?

        Tuesday, February 22, 2011

        Pretty Pretty Boards

           
          I am always saving little mementos from trips be it ticket stubs to museum guides, but I never know what to do with them. Often they just get filed away in labeled shoe boxes at the back of my closet for what occasion, I don't know. My friend, Lily (of the cranberry compote and brie bites fame) has some great ideas of how to show off your little mementos or other important things. These cute boards look great when lined up or alone on a wall, and since they are made from foam board, you can use 3M wall adhesive so you don't have to use nails (a big help for those who are renting a place). With all the different themed papers out there, you can find something to match just about anything!


        I just cut the boards in the center, they were the perfect small size!

        Materials:

        Modpodge

        Foam brush

        Scrapbook or other decorative paper

        Foam Board

        Scissors/ knife


        Directions:

        1. Cut the board and paper to desired sizes, the paper can be left a bit bigger to cover the sides of the board.
        2. Modpodge the board with a light coat, then press down paper. Go slowly, and use pressure of fingers or ruler (be careful) to work out any bubbles. Lightly modpodge the paper as well once smooth.
        3. Let dry, then coat the paper with a second and if needed, a third coat of modpodge.
        4. Enjoy! Use push pins or ribbon to help decorate your board!


        This one is for my roommate, Charlotte, who loves old keys. See you can match any theme!


          Monday, February 21, 2011

          How To Save On: Dishes

               I love to have people over for a meal, it's the perfect opportunity to sit down and actually have a nice conversation with someone uninterrupted by wait staff or bills. Once when I was having a bunch of people over for a Sunday brunch, I realized I didn't have enough matching dishes for everyone. I thought about using mismatched ones but sadly my attempts look mismatched à la anthropologie displays just come off as à la goodwill. So in a desperate search to find affordable pretty everyday dishes, I ventured in to my nearest Dollar Store and Wal-Mart and found some great solutions.


          The larger dishes I got a the dollar store for 1 DOLLAR each, so I could easily afford to spend 10 and get 10 pretty dishes

             I purchased the champagne glasses and smaller plates at Wal-Mart, the champagne glasses came in packs of four for about $4.50. The smaller plates were about .97 cent each. The wine glasses were from Target and came in a big pack for $15.99  for 18 glasses.


               So for fewer than $4.50 per setting, I was able to get pretty glassware that can be reused for every time. I made sure to buy simple wares that could be used for every occasion and not to buy a bunch of Christmas dishes that could only be used for about one month per year. These dishes are pretty enough to add some flair to the table but not clash with any theme or occasion!

          Wednesday, February 16, 2011

          Glitter Candles

                So I love candles and I love glitter, thus I combined the two to make some cute decorations. These are quite simple to make and can be customized to make a great gift. The color and style combinations are endless, so you could make one to match every room, or mood.


          Materials:

          Modpodge

          Foam brush

          Candle

          Glitter (the finer the glitter the better it looks)

          Newspaper or other drop paper 


          Directions:

          1. Use a generous amount of modpodge so outline your design on the candle. Then sprinkle the glitter over, sprinkle a lot!
          2. Wait for it to dry, and then tap the candles to free lose glitter. You can take a damp paper cloth to pick up lose glitter off the candle to clean it up.


          1. Good Luck!

          Weekly Wanted Wonders

               This week is all Valentines for me, hearts and pinks galore. Perhaps, it's because I am not celebrating Valentine's Day until Friday. Oh well, you can deal, right?


          1. Dinner on my heart plates.
            They inspire me to break out my cookie cutters more.
          2. High Gloss.

             This magazine looks so cool, now do they make a semi-gloss one for those without unlimited budgets?

            Glittered Candles.
            Because everything looks better in candlelight and with sparkles
          3. Whimsy Clock.
          4. Beautiful quill and aubergine ink.

             From my mom for Valentine's Day, now if only my attempts at calligraphy were better.


          5. What's inspiring you this week?

          Tuesday, February 15, 2011

          Pretty Pretty Organizers


               I hate wasting things, and after everyone it seemed got sick this past month, I've gone through tons of tissue boxes. Luckily, Lily had just the idea of how to reuse them. With a few modifications, these boxes can now hold all sorts of things from pens and pencils to nail kits holding the files, polish removers and more. Plus they are super cute to make and look adorable all lined up.


          Materials:

          Empty Tissue Box

          Exacto Knife

          Modpodge

          Scrapbook paper or decorative paper

          Embellishments (Ribbons, glitter, stickers, etc)


          Directions:

          1. Using knife, carefully cut off the top of the tissue box (the part where the tissues used to come out) and try to make it a good even cut.
          2. Take the paper and cut it to cover all four sides (make the height one inch more than needed). Then simply use modpodge to glue it down, leaving a half inch overhang on the top and bottom. (for a stronger box, once dry use another layer of modpodge on top)
          3. Fold bottom of paper and secure the top section with modpodge.
          4. Embellish it as you like. 


            Good Luck!

            Monday, February 14, 2011

            Happy Valentine’s Day!

            Happy Valentine's Day to you and your loved ones!


            P.S. I got flowers! Yay! Now if I could only pick a favorite flower, so I don't keep driving my boyfriend crazy by constantly changing my mind...

            Sunday, February 13, 2011

            Martha Stewart Sunday: Strawberry Shortcake Cookies


                  Well, I saw these fabulous cookies and wanted to try to make them after tearing out the recipe from Martha Stewart; however, I baked them late at night while a bit sleepy and didn't fully read the recipe. I just dumped everything in the bowl and mixed it instead of making the batter first then cutting in the strawberries. The good news is they still taste delicious!

             Here's the recipe:
            Strawberry Shortcake Cookies
            Makes about 3 dozen
            • 12 ounces strawberries, hulled and cut into 1/4-inch dice (2 cups)
            • 1 teaspoon fresh lemon juice
            • 1/2 cup plus 1 tablespoon granulated sugar
            • 2 cups all-purpose flour
            • 2 teaspoons baking powder
            • 1/2 teaspoon coarse salt
            • 3 ounces (6 tablespoons) cold unsalted butter, cut into small pieces
            • 2/3 cup heavy cream
            • Sanding sugar, for sprinkling
            •  


              Directions

              1. Preheat oven to 375 degrees. Combine strawberries, lemon juice, and 2 tablespoons granulated sugar. Whisk together flour, baking powder, salt, and remaining 7 tablespoons granulated sugar in a large bowl. Cut in the butter with a pastry cutter, or rub in with your fingers, until mixture resembles coarse crumbs. Stir in cream until dough starts to come together, then stir in strawberry mixture. (Or you can just throw all the ingredients in one bowl and use an electric mixer for about one minute on medium)
              2. Using a 1 1/2-inch ice cream scoop or a tablespoon, drop dough onto baking sheets lined with parchment, spacing evenly apart. Sprinkle with sanding sugar, and bake until golden brown, 24 to 25 minutes. Transfer to a wire rack, and let cool. Cookies are best served immediately, but can be stored in an airtight container at room temperature for up to 1 day.
              Strawberry-Shortcake Cookies - Martha Stewart Recipes

               
              Have you ever not read the directions and still made the recipe work out fine?

              Saturday, February 12, 2011

              Cranberry Compote

              So for the second part of the Brie Bites installment, I have the very easy recipe from Lily taken from a Martha Stewart hostess gift! It's the perfect addition to Brie Bites or simply just a piece of plain old bread.


              HOMEMADE CRANBERRY COMPOTE

              • 1 bag fresh (or frozen) cranberries
              • ¾ cup sugar
              • ½ cup (possible more) cranberry juice


              Put the entire bag of cranberries in a small pot on medium heat

              Let the cranberries heat up and soften (you will see the skin burst and make soft pops)

              After about five minutes, pour in the sugar and cranberry juice. Stir and mix well

              Let the mix simmer on medium for about 15 minutes. It will bubble and stir every few minutes so it doesn't congeal.

              • If it looks too thick at first, add a little more juice
              • If it tastes too tart (this all goes by your taste, after all!) add a little more sugar


                Once the mixture has reduced, take it off the heat and let cool for about five minutes

                There are three ways to finish your compote:

                1. Leave as is. This way will be slightly more congealed and chunky, but still delicious!
                2. Pour the slightly cooled mixture into a blender (even a hand blender will do). Blend until the chunks are blended out (the mixture will get hotter as it blends, so be careful). The seeds will still be there but the mixture will be much smoother
                3. To make the ultimate in silky cranberry deliciousness, first complete step 2. After the mixture is blended and slightly cooled, pour the mixture through a fine mesh strainer. It's easiest to do this a few spoonfuls at a time so you don't spill it out the sides. Push your spoon down on the strainer to help the mixture go through and move the seeds aside. Strain the mixture once, and maybe twice if you reeeeally want some super silkiness!
                4.  
                  Pour in a small airtight container (or a glass jar if you're giving it as a gift!)


                  Good Luck!

                  Friday, February 11, 2011

                  Easy Entertaining: Brie Bites

                  So you may have noticed the lovely little pastries at my Valentine's Crafternoon party, they were made by my best friend, Lily. As I lover of brie, jams and all sorts of carbs, I was delighted when she suggested bringing some over. They are quite easy to make and sadly, were the first thing gone at the party. I asked her to send me the recipe, and luckily for all of us, she obliged. 


                  BRIE BITES

                  • 1 round brie (a wedge will work for minis or just one serving of the regular size, otherwise you'll need a round
                  • Pillsbury biscuits or crescent roll/croissant dough (1-2 packages)
                  • Jam (homemade compote if you've got it)(*recipe to come later) 


                    For the minis: get a mini cupcake pan put one biscuit dough round in each cup

                    • Cut the brie up into small cubes (after removing the top of the brie round, the stiff white layer)
                    • Place one brie cube into each cup and top with a teaspoon of the jam
                    • Pull the sides of the dough up and pinch at the top to seal


                      For the regular size, you'll need either two biscuit rounds or a stretched out crescent triangle

                      • Place one biscuit down in the cup, stretching it until it covers the entire cup.
                      • Place a larger square of brie and a tablespoon or so of jam (go by sight, you don't want it to overflow)
                      • Then flatten out another round of dough against your palm to make it thinner and flatter
                      • Put it on top of one of the filled brie cups and push the sides down to seal it 


                         Bake according to the instructions until light golden brown (350 for about 8 to 12 minutes, depending on size)

                        Serve with a drizzle of honey. And careful… they're hot!


                        Thanks, Lily!